
Stardew Valley Greenhouse Layout: Sprinklers, Trees and Crops
A good Stardew Valley greenhouse layout is less about copying one perfect screenshot and more about protecting your daily routine. The building gives you a year-round growing space, but every tile competes between crops, sprinklers, paths, fruit trees, machines, and decoration. This guide starts with a practical default, then shows how to adapt it for low-maintenance crops, an orchard edge, or a mixed farm.
Start with a clear central path, place your strongest sprinklers around compact crop blocks, and keep fruit trees on the outside where their growth space is easier to protect. Choose the final crop mix only after you know whether your bottleneck is seeds, harvest time, or processing machines.
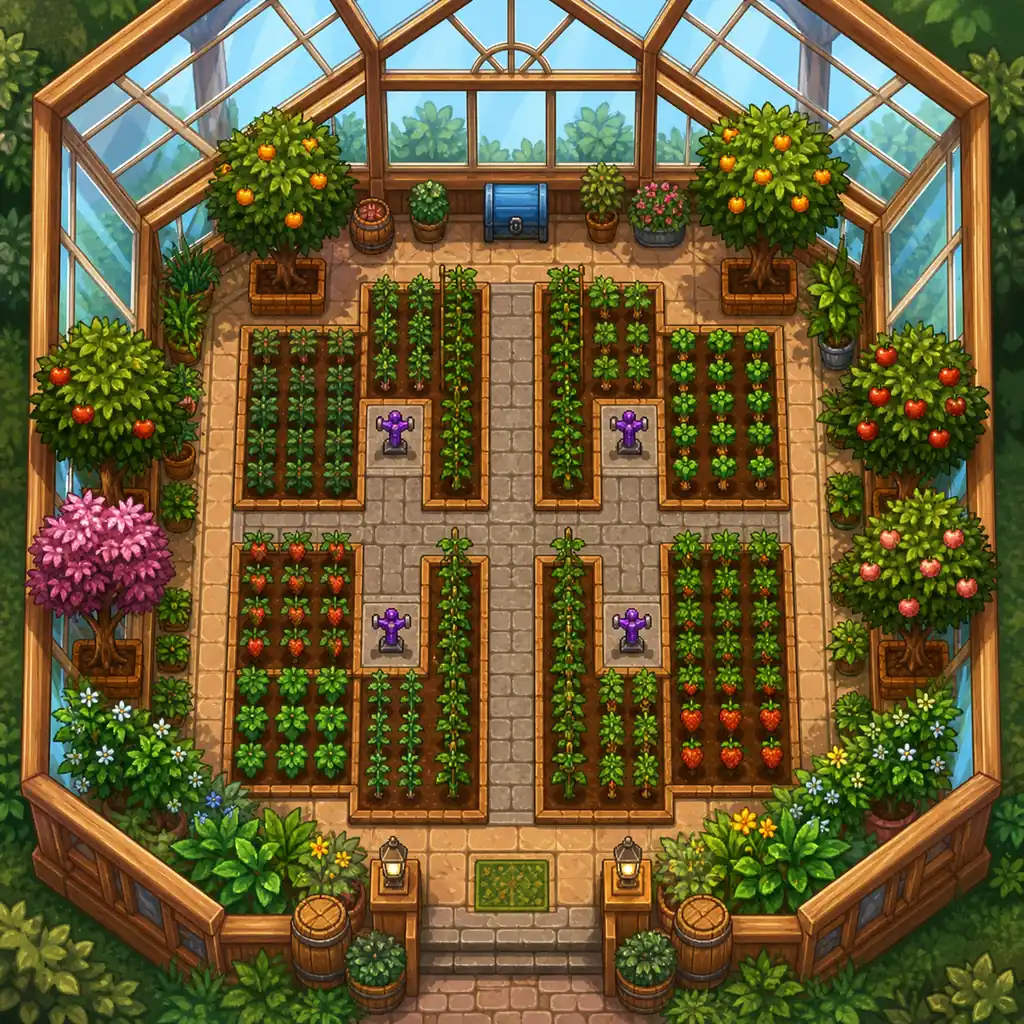
Unlock the greenhouse before planning every tile
The greenhouse is a permanent farm building once it has been restored through the normal Community Center route or the Joja development route. You do not need a separate greenhouse for each season: the useful planning question is how to make the one building support the rest of your farm. Confirm the building is repaired, then sketch a layout before spending rare seeds or moving mature trees.
- 1
Repair the building
Finish the route that restores the greenhouse, then enter it once to confirm the interior is available. The exact route matters for your save, but the later layout decisions are the same.
- 2
Choose the main job
Decide whether the room is mainly for repeated crops, high-value seasonal crops, fruit trees, or a mixed plan. A clear job prevents the centre from becoming a storage room that is awkward to harvest.
- 3
Mark the walking lane
Leave one predictable route from the door to the back of the room. A slightly lower theoretical tile count is usually worth it if you can harvest without clicking around trees, sprinklers, or machines.
Planning limit: The greenhouse is a layout problem, not a promise of maximum profit. Crop prices, seed access, farming profession, machine capacity, and your real play schedule all change the best answer.
Build the layout around access first
The strongest default is modular: compact crop blocks in the centre, a path that stays open, and edge tiles reserved for objects that need special space. Put high-touch crops close to the entrance and leave the far corners for plants you harvest less often. If you change goals later, you can remove one block without rebuilding the whole room.
| Farm goal | Practical placement | Trade-off |
|---|---|---|
| Low-maintenance crops | Four compact crop blocks with a regular sprinkler pattern and one centre lane | Uses a little less planting space than a wall-to-wall grid, but harvesting is faster and safer. |
| Fruit-tree border | Keep trees around the outer edge and crops inside the protected centre | You give up some crop tiles while trees mature, but the room becomes easy to read. |
| Mixed production | Use one crop block for recurring harvests, one for seasonal crops, and a free corner for a chest or machines | More flexible, but the plan is less efficient if every tile is judged only by gold per day. |
| Bundle or perfection push | Reserve space for missing crops and use the crop blocks as a checklist, not just a profit chart | Short-term profit may fall, but the layout supports a wider completion goal. |
Keep the visual blueprint as a reference, not a rule. Furniture, paths, sprinklers, and trees can be moved later, so a layout that remains understandable after one change is usually more useful than a tightly packed pattern.
Use sprinkler coverage to define the crop blocks
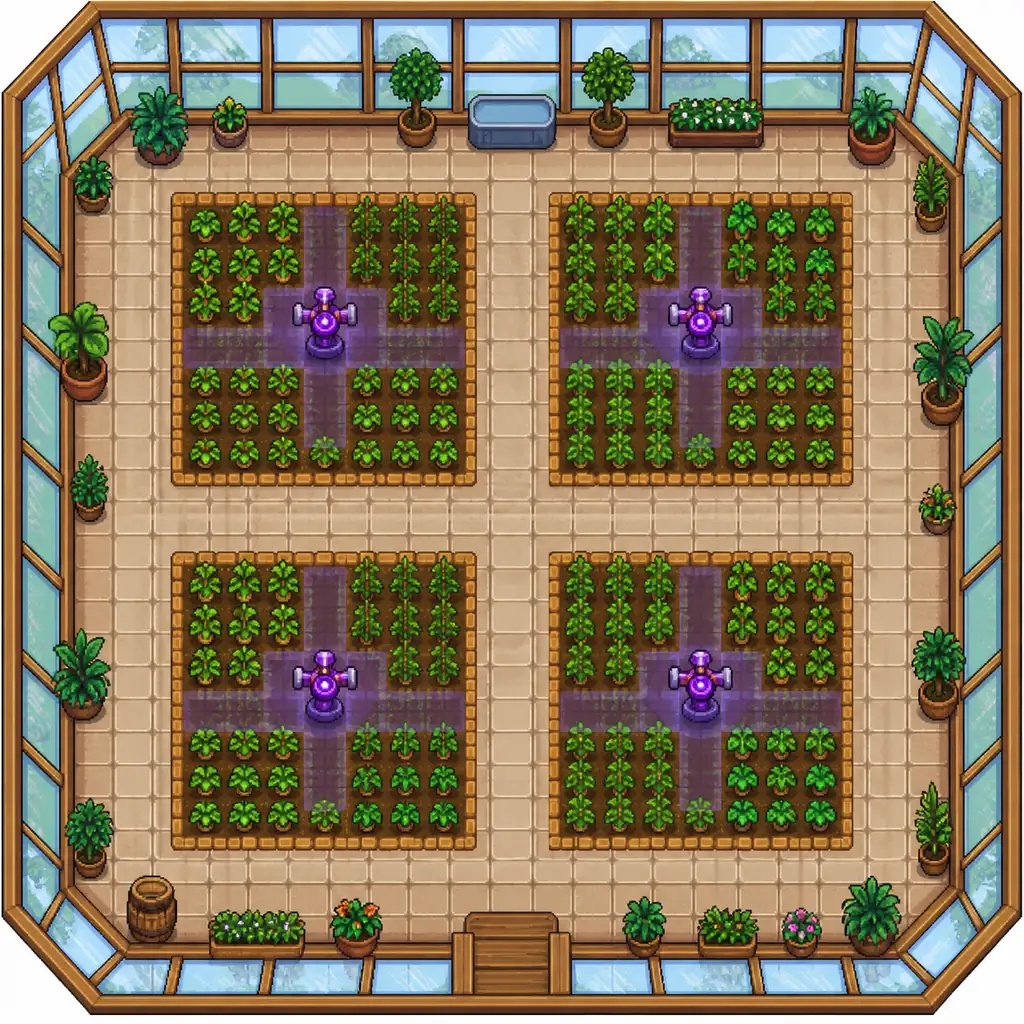
Sprinklers turn the greenhouse into a predictable grid. Iridium sprinklers are the cleanest default because they cover a large cross-shaped area around each unit. Quality sprinklers are still workable when your save has fewer iridium bars, but they need more careful spacing and may leave a few awkward tiles. Leave enough lane space to refill, harvest, and replace crops without breaking the pattern.
- 1
Place one test unit
Before filling the room, place a sprinkler and walk around its coverage. Confirm that the crop tiles you care about are actually watered, because a visually symmetrical pattern can still leave corners dry.
- 2
Mirror the blocks
Repeat the same small block instead of drawing one giant maze. Mirrored blocks make it easier to remember where a new seed belongs and where a harvested crop is missing.
- 3
Protect the lane
Do not hide the main path behind decorative objects. The lane is part of the sprinkler plan because it gives you access to every block and leaves room for future changes.
- 4
Audit after upgrades
When you replace quality sprinklers with iridium sprinklers, rebuild the affected block instead of dropping the new unit wherever a tile happens to be empty. A quick recheck prevents invisible gaps.
Treat fruit trees as a protected border
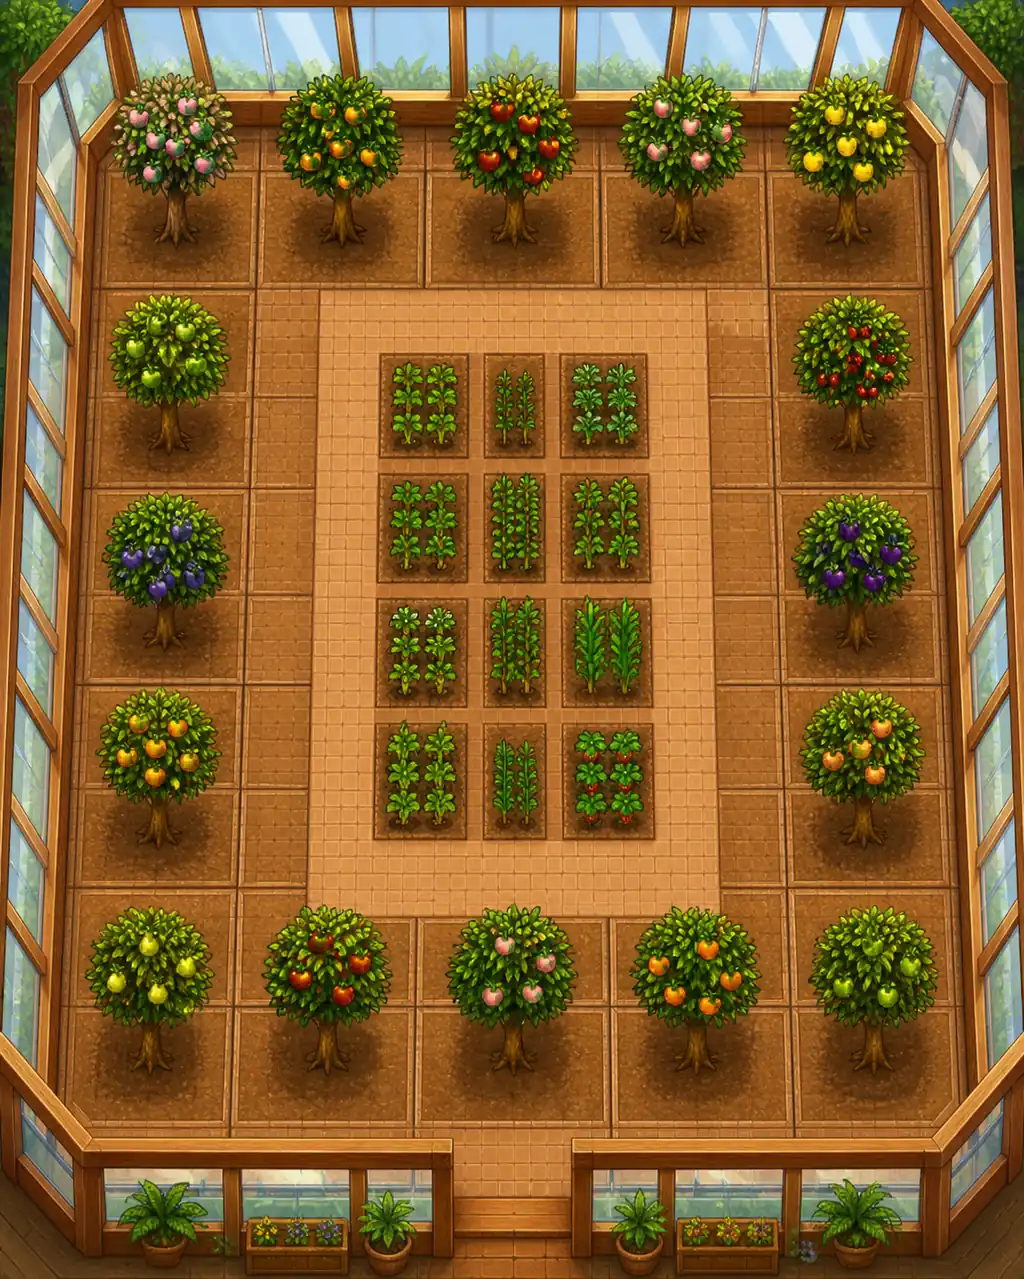
Fruit trees are the part most likely to break an otherwise tidy greenhouse layout. Their trunks need clear surrounding tiles while they grow, so do not plant a tree and then fill its neighbouring spaces with crops, paths, or decorations. A simple approach is to use the outer wall as an orchard border and keep the centre for crops that can be replanted.
Leave growth space
Keep the tiles around a young tree clear until it is fully grown. A tree that looks decorative can still fail to mature if nearby objects block the required space.
Use the edge
The perimeter is easier to inspect than a tree hidden in the middle of a crop grid. Border trees also leave the central lanes available for sprinklers and harvesting.
Accept the trade
An orchard-heavy room gives up some crop tiles. It can still be the right choice when daily fruit collection, artisan production, or visual clarity matters more than maximum planting density.
Choose crops by routine, not by one headline number
The greenhouse makes multiple crop plans possible. Repeated-harvest crops reduce replanting, high-value seasonal crops can reward careful seed planning, and a completion-focused room may need crops that are not the best sellers. Separate the room into zones so one decision does not force the whole greenhouse into the same schedule.
Recurring harvest block
Use a zone for crops that regrow. Put it near the most convenient path if you want a quick daily or weekly harvest loop.
High-value cycle
Use another zone for a crop with a larger payoff per harvest when you already have seeds and enough processing capacity to use the yield.
Completion block
Reserve a few tiles for bundle, cooking, shipping, or perfection requirements. A small checklist zone can prevent a late-game scramble.
Machine-aware space
Do not count a crop's theoretical value as real output if kegs, jars, chests, or your play time cannot keep up with the harvest.
Need the numbers? Use the site's Stardew Valley Crop Profit Calculator
Common greenhouse layout mistakes
A greenhouse can be productive even when it is not perfectly packed. Most frustrating layouts fail because they are hard to inspect, difficult to change, or built around assumptions that do not match the player's save.
Blocking young trees
Planting crops or placing paths beside a young fruit tree can delay growth. Mark the orchard tiles first, then fill the remaining soil.
Losing the route
A maze of objects may fit more tiles on paper but makes harvesting slow. Keep a readable route from the door to every block.
Copying profit claims
A crop ranking from another farm may assume a different season, profession, seed source, machine count, or number of available days.
Refusing to revise
The first layout is not permanent. Rebuild one block at a time when your sprinkler tier, crop goal, or processing setup changes.
Stardew Valley greenhouse layout FAQ
How many greenhouses can you have in Stardew Valley?
The normal game provides one restored greenhouse per farm. That is why the best layout is the one you can harvest and revise comfortably, not simply the one that looks fullest.
What is the best Stardew Valley greenhouse layout?
For most farms, use a regular sprinkler grid in the middle, keep a clear lane, and place fruit trees only on an inspected outer border. Adjust the crop zones to your seed supply and machine capacity.
Can fruit trees grow inside the greenhouse?
Yes. They can grow inside the greenhouse, but their surrounding tiles must stay clear while they mature. Do not fill the orchard border with paths or crops until the trees are established.
How many sprinklers fit in the greenhouse?
There is no single best count because sprinkler tier and walking lanes change the pattern. Test one unit, mirror the coverage block, and keep a route to every crop group.
Should I use the greenhouse for Ancient Fruit or Starfruit?
Either can work. Ancient Fruit favours repeated harvests, while Starfruit needs more seed planning and a different harvest rhythm. Compare your actual schedule, seed access, and processing capacity before changing the whole room.
Can I change my greenhouse layout later?
Yes. Crops, sprinklers, paths, and decorations can be rearranged later. A modular layout with lanes is easier to change than a solid block that leaves no access.
Related Stardew Predictor tools
Sources and scope
- Stardew Valley Wiki: Greenhouse — Building rules, planting space, and restoration context.
- Stardew Valley Wiki: Sprinkler — Sprinkler tiers and watering coverage.
- Stardew Valley Wiki: Fruit Trees — Fruit-tree growth and clear-space rules.